

Hello My Beautiful Friends!
Have y'all tried or heard about Nail Foils? I've heard about Nail Foils, but I had never tried them for some reason. Anyhoo yoohoo... I'm so glad that I attended Honeyz Cube Tea Party and received Rio Holographic Nail Foils by Aibi Style to try out at home.
Rio Holographic Nail Foils have this little kit that comes with stuff that you can have fun and create various looks on your nails. I'll be honest with y'all, I am not very good in doing my own nails. So trust me... this kit is uber easy to use and last longer on nails, but be sure to follow the simple instructions closely. I love, love, love it because it makes my life easier when I want my nails to look stunning!
As promised, in this entry, I'm sharing with you a step-by-step tutorial + review of Rio Holographic Nail Foils.
Inside The Magic Box

Retail Price : S$75.00
Made in The UK.
Here's the contents of the Nail Foils Box:
~ Instructional DVD
~ Design Chart
~ Instructional Booklet
~ Nail Foils kit
Inside The Kit


Here's the contents of the Nail Foils kit:
~ 2-IN-1 Varnish
~ Nail Adhesive
~ 10 Rolls Nail Foils
~ Rhinestones
~ Glitter
~ Fine Detail Brush
~ Hoof Stick
Ingredients:
Foil Adhesive:
Aqua, Acrylates copolymer, Mica, Silica, CI77891
2-IN-1 Varnish:
Alcohol denat, Ethyl Acetate, Butyl acetate, Nitrocellulose, Tosylamide/Epoxy Resin, Isopropyl Alcohol, Acetyl Tributyl citrate, Acrylates Copolymer, Butyl Alcohol, Benzophenone-1, CI 60725
STEP BY STEP TUTORIAL
Alright now, let's get gorgeous!
STEP 1


Prep the nails - filing, shaping, buffing moisturizing & etc.
Nails must be clean and dry.
Soak a cotton pad in nail polish remover and clean nails.
Pssst....I'll be doing on a separate post on how I prep my nails for any nail enhancements.
So stay tuned!
STEP 2


Apply 2-in-1 Varnish or any normal nail polish and leave to dry for couple of minutes.
* Remember, do not apply foils on natural nails because it will not stick well.
Always apply a nail polish or 2-in- varnish before foil application.
STEP 3


Apply a thin layer(but not too thin) of foil adhesive to desired area.
Allow the foil adhesive to go completely clear and tacky before applying foils.
STEP 4


Cut the foil into small pieces into your desired shapes and fit your nails.
Place foil pattern facing up over nail and press down firmly.
Use hoof stick and rub the foil firmly to transfer it onto nail.
STEP 5
Slowly pull away the backing film.
STEP 6


Seal with 2-In-1 Varnish and leave it to dry.
Apply a second coat of 2-In-1 Varnish.
Remember to cap the free edge (Sweep varnish across the tip of the nails)
Now, you can also add embellishments such as rhinestones or glitters if desired.
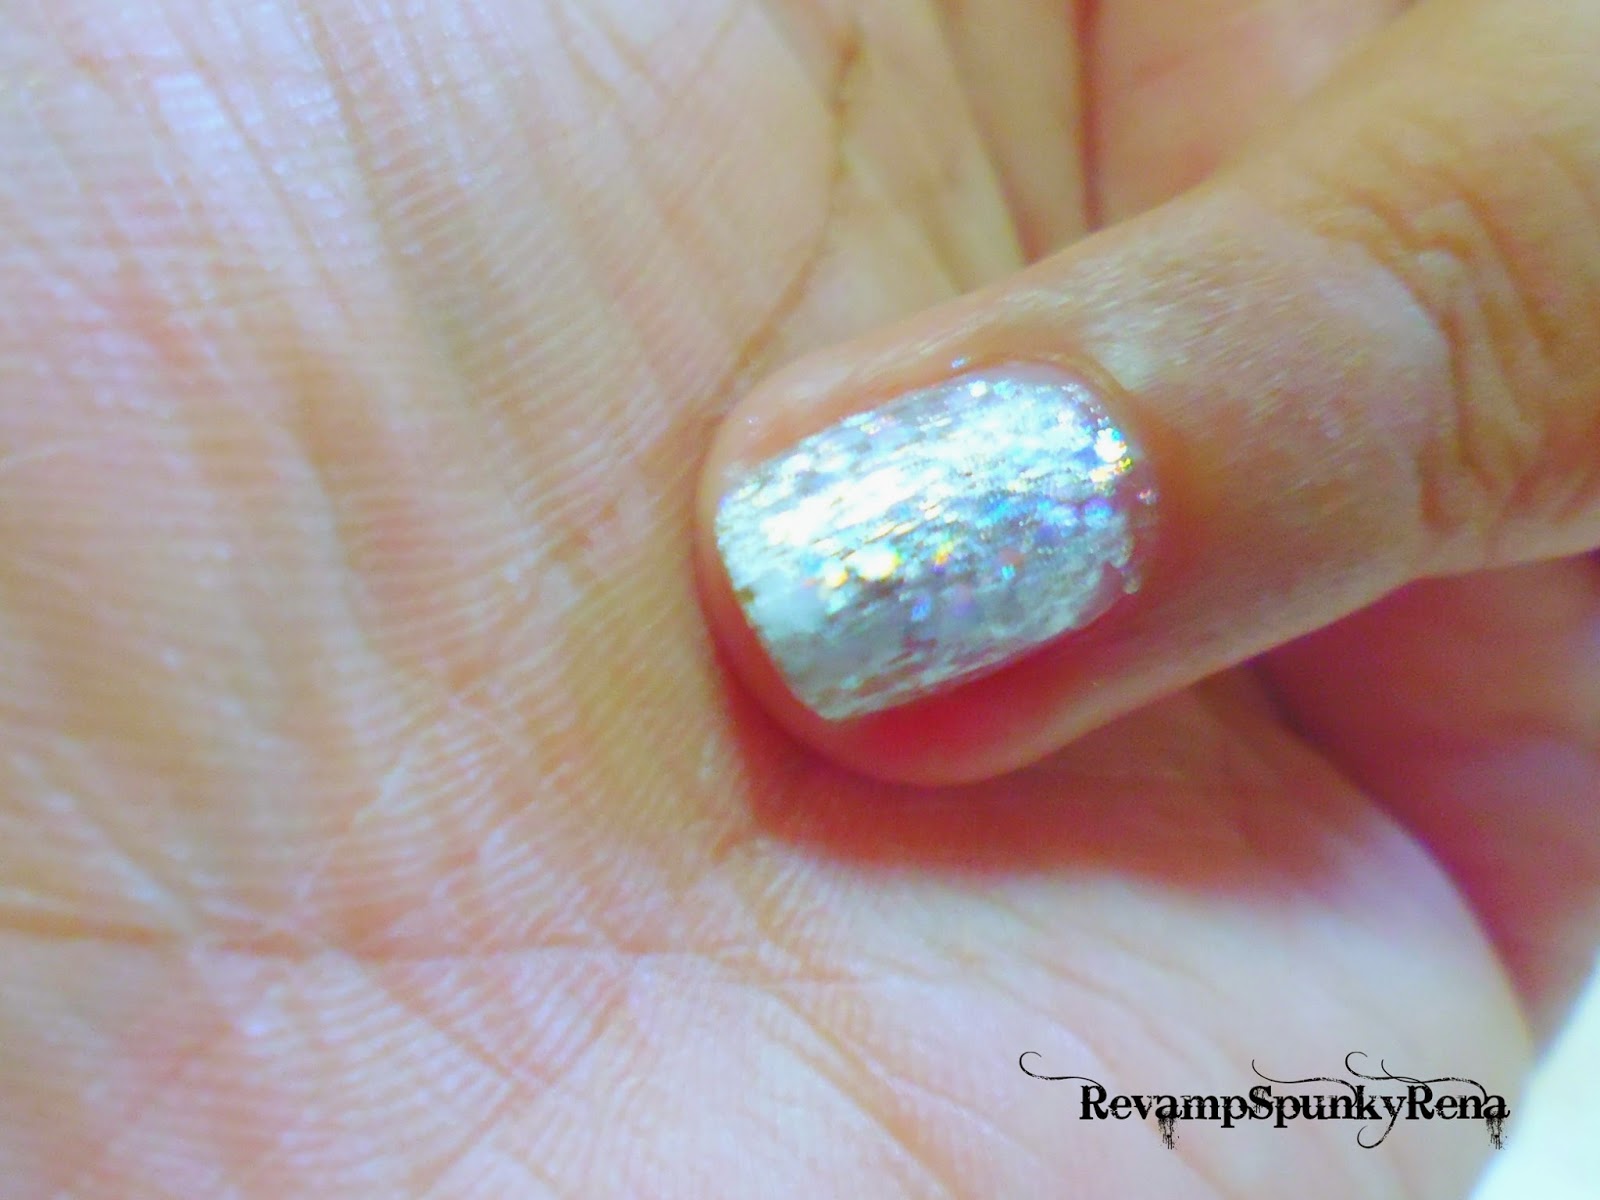
VERDICT
My first attempt was fun and successful. As I mentioned earlier, I ain't good at painting and designing my nails and hopeless at using my left hand. I must say this method has helped me alot! I really loved this Nail Foils kit because .........
- It's ideal for everyone
- I don't have to spend hours perfecting and dressing up my nails.
- I can do my nail foils at the comfort of my home, while sipping on a huge glass of spinach juice.
- I can create my own design and show it off to my friends ..kikikiki......
To keep the foils in place, I applied 2-in-1 varnish everyday and placed foil on any missing bits. I have had the foils on my nails for a week and I love them!
IMPORTANT
TIPS:
- To maximise the life of your designs apply 2-In-1 varnish everyday, remembering to cap the free edge each time.
- If a bit of foil is missed simply reapply a small amount adhesive and patch.
- You could also use a cotton bud or your finger to rub foil onto nail.
- When creating partial foil designs, experiment. Try different base colors with same foil, you will be amazed by the effects. Remember the foil will only stick to where the adhesive is applied try creating patterns.
- To remove foil use nail polish remover, do not use acetone if you wear nail extensions.
- To prolong the life of your nails, do not use detergents or bleach without wearing rubber gloves.
- If you have Rio UV Nails seal your designs with super protective UV Gel.
PRECAUTIONS:
- Please remember not to use if you have open cuts on or around the cuticles.
- Keep away from sources of ignition.
- Not to be taken internally.
- Do not breathe vapours, use in a well ventilated area.
- Avoid contact with eyes.
WHERE TO GET RIO HOLOGRAPHIC NAIL FOILS.
Available at :
All AIBI Style Retail Stores : http://www.aibistyle.com/
Online Store : http://www.aibistyle.com/
About AIBI Style
AIBI Style, AIBI's dedicated beauty extension, brings salon-quality beauty treatments to the comfort of your own home. With Rio and no!no! from UK and Israel respectively under its wing, their range of products includes hair removal gadgets to teeth whitening kits. Currently, AIBI Style retail stores are found in Singapore and Malaysia.
LOVE

Disclosure: I received the product from attending Honeyz Cube Tea Party. I am not getting paid for this post and not affiliated with said brand. Images above taken by me unless otherwise stated.
I really love the green (2nd pic) ones best. Which one is your fave?
ReplyDeletehttp://louiseabenamensah.blogspot.co.uk/ xx
I love the blue one. Beautiful!
Delete